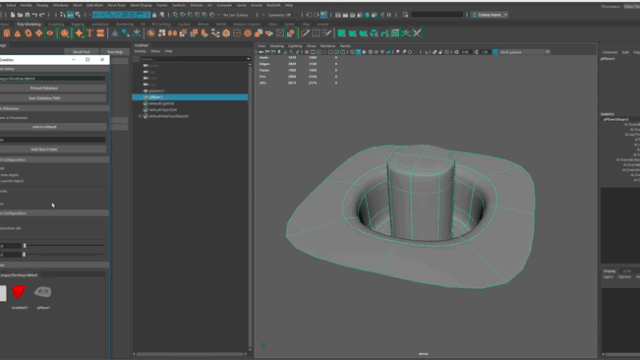
↑サンプル動画
エッジを入れる事によって角をパキッとさせる事が出来ますが、mayaでは【insert edge loop tool】を使うとぐるっと一周簡単にエッジを入れる事が出来ます。
inset edge loop toolはショートカットキーで呼び出しましょう
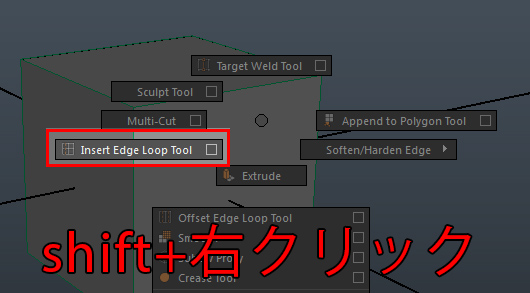
MAYAの作業画面上で【shift】を押しながら【右クリックを押すと】メニューが表示されるので、その中から【insert edge loop tool】を選択すると簡単に使うことが出来ます。
使う時はオプションで設定をしましょう
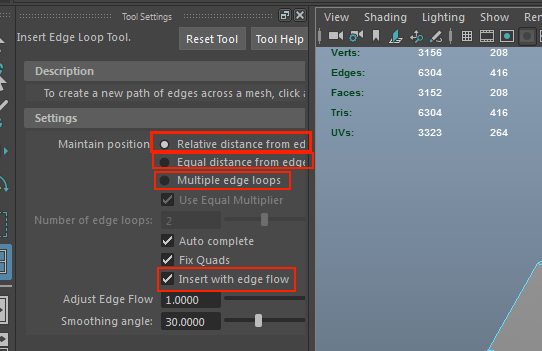
insert edge loop toolを使う時は
・Relative distance from edge
・Equal distance from edge
・Multiple edge loops
また
・insert with edge flowの4つのチェックが重要となります。
真ん中にエッジを入れる方法
【Relative distance from edge】は異なる幅の面に真ん中にエッジを入れる時に便利です。
エッジを立たせる時に使おうとすると面の幅が違うとこのようになるので注意してください。
均等にエッジを入れる方法
均等にエッジを入れたい場合は初期設定ではなくオプションから【Equal distance from edge】を選んでクリックすると均一にエッジを入れる事が出来ます。
入力した数字の分、面を分割する方法
【Multiple edge loops】にチェックを入れて数字を入力すると、入力した数字の分だけ面を分割してくれます。ここでは2と入っているので、1クリックすると2エッジ挿入してくれています。

面をいい感じに膨らませる方法
ただエッジを入れるだけでなく、【insert with edge flow】にチェックを入れると、エッジをいい感じに自動で膨らませてくれます。