![](https://modelinghappy.com/wp-content/uploads/2018/04/180410_uv_maya_01.png)
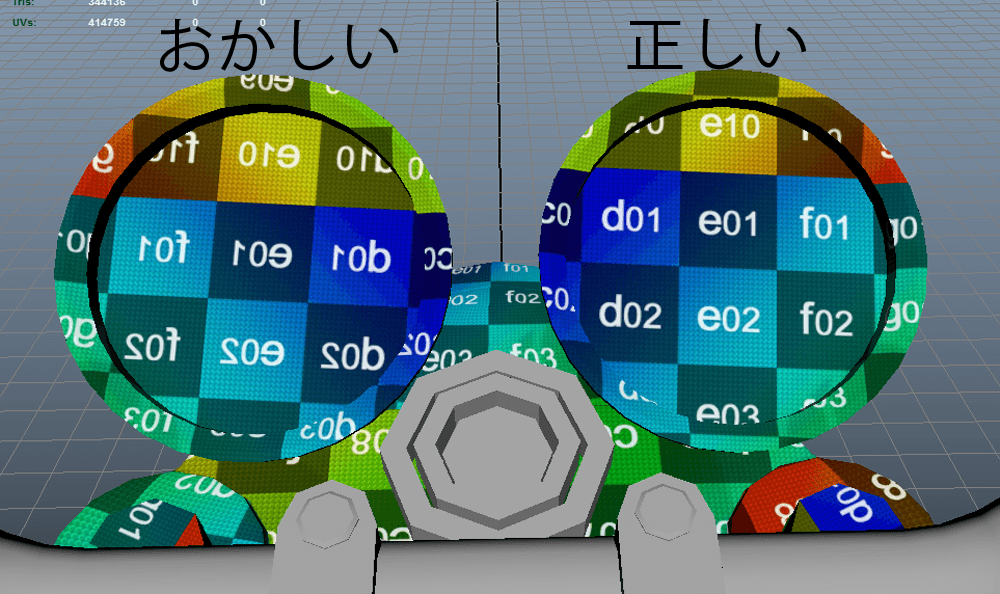
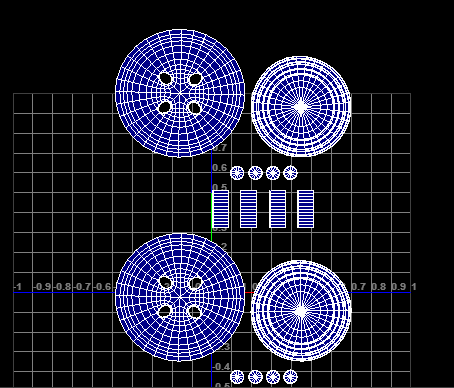
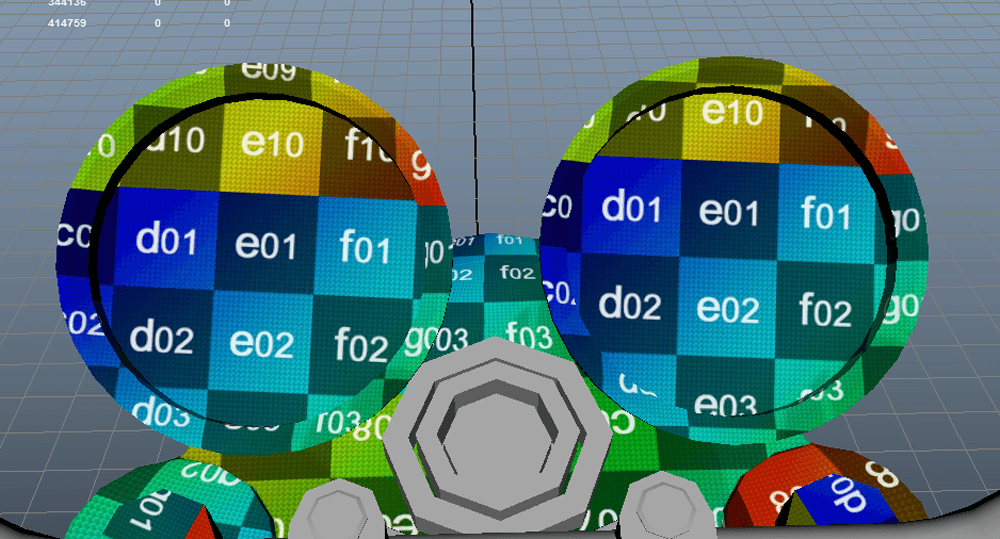
右側のUVが正しく表示されているのに、左のUVが文字が反転されている..。
![](https://modelinghappy.com/wp-content/uploads/2018/04/180410_uv_maya_02.png)
しかしUVを確認するとしっかり青く表示されている!えっ?!なんでだろうか…?!そんな時の対処法です。
![](https://modelinghappy.com/wp-content/uploads/2018/04/180410_uv_maya_04.png)
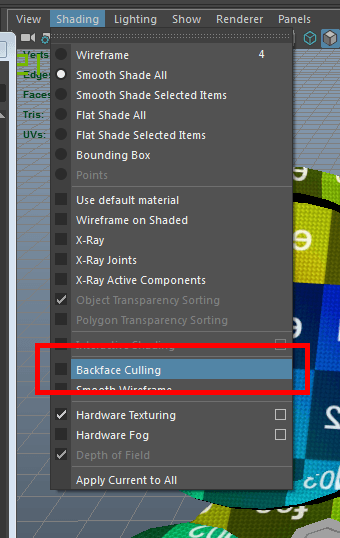
まずはモデルが反転されてるのかな?と思いビューポートの上にあるBackface Cullingにチェックを入れます。
![](https://modelinghappy.com/wp-content/uploads/2018/04/180410_uv_maya_05.png)
Backface Cullingにチェックを入れるとモデルの裏側が黒く表示されるのでこのモデルが反転されている事が分かりましたので、
![](https://modelinghappy.com/wp-content/uploads/2018/04/180410_uv_maya_06.png)
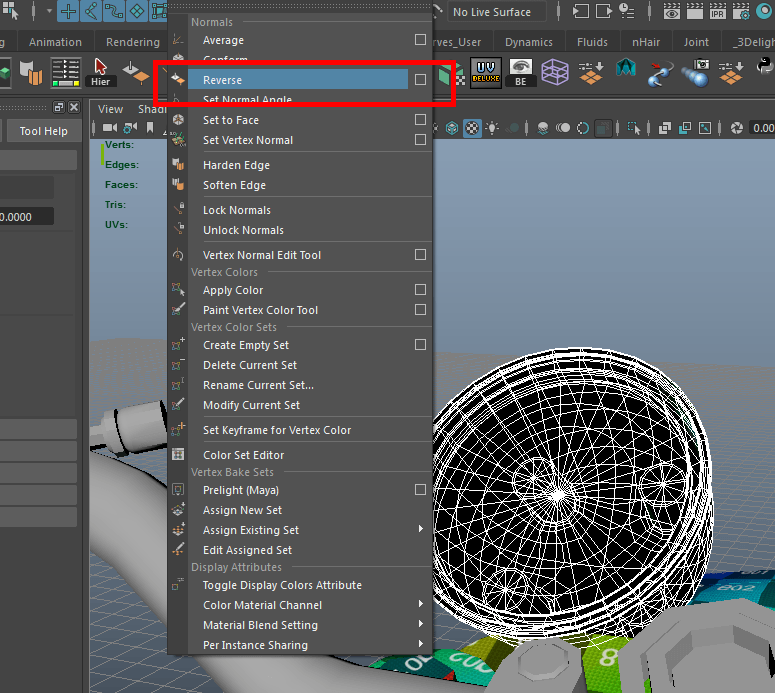
モデルを選択してNormals→Reverseを選択してモデルを反転します。
![](https://modelinghappy.com/wp-content/uploads/2018/04/180410_uv_maya_07.png)
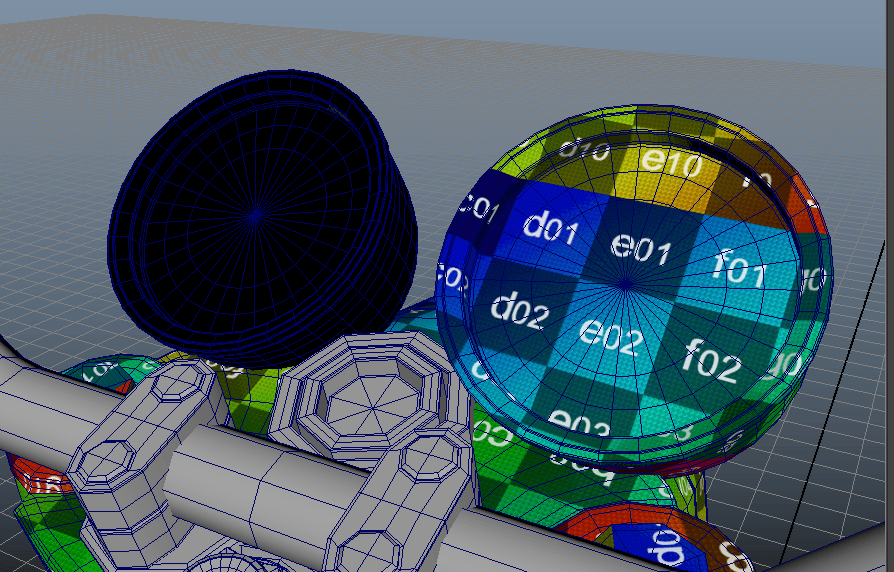
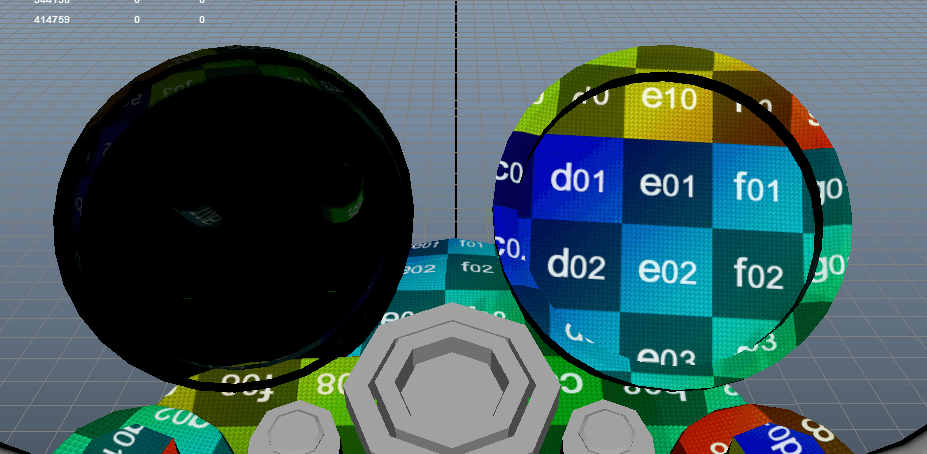
するとモデルは反転されたけど真っ暗。あれ?黒いチェクスチャを張ったっけ?!と思いますが違います。
![](https://modelinghappy.com/wp-content/uploads/2018/04/180410_uv_maya_08.png)
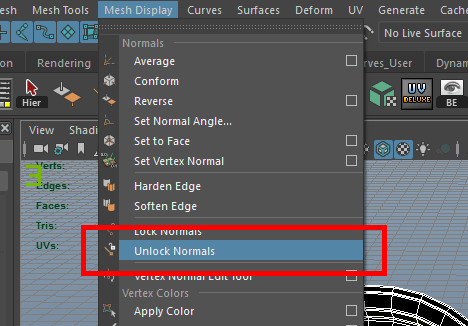
Mesh Display→Unlock Normalsを選ぶと
![](https://modelinghappy.com/wp-content/uploads/2018/04/180410_uv_maya_09.png)
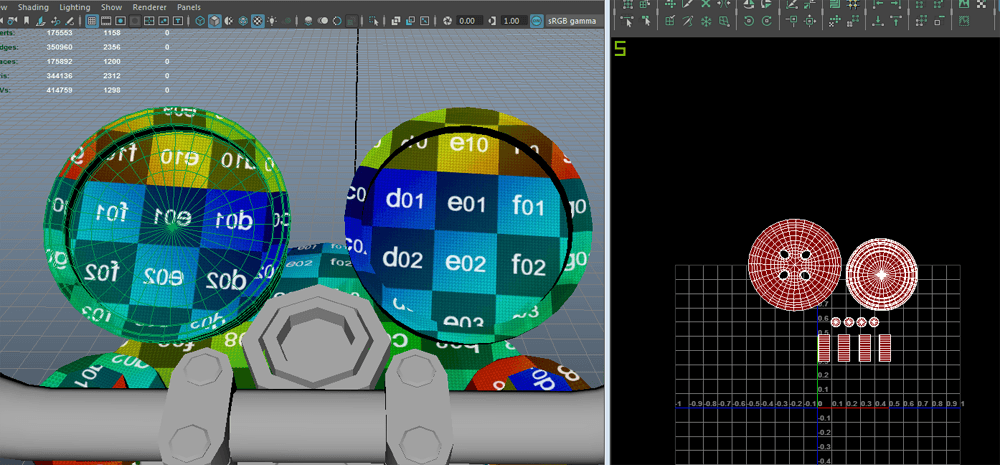
モデルにテクスチャがしっかり表示され、UVが赤く表示されました!
![](https://modelinghappy.com/wp-content/uploads/2018/04/180410_uv_maya_11.png)
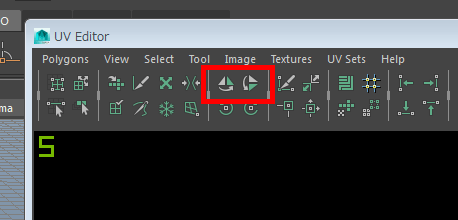
UVを選択してUV Editorの赤枠のどちらかをクリックすれば反転され
![](https://modelinghappy.com/wp-content/uploads/2018/04/180410_uv_maya_12.png)
UVが青く直れば完成です!
![](https://modelinghappy.com/wp-content/uploads/2018/04/180410_uv_maya_13.png)
回の例だと左右同じパーツなので正しいモデルをコピーしたら一瞬で終わりますが、いざという時にどうやって直すのか参考にしてくれたら嬉しいです。